|
Capture and process a ROM trial
In the new workflow, instead of capturing an initial static trial, you begin by capturing a ROM (Range of Motion), as described in the following steps.
To use the new workflow to calibrate a subject:
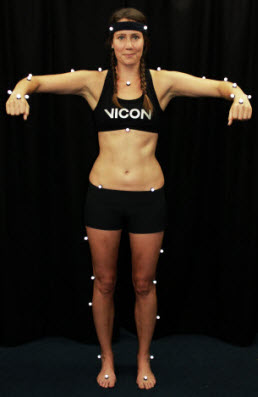
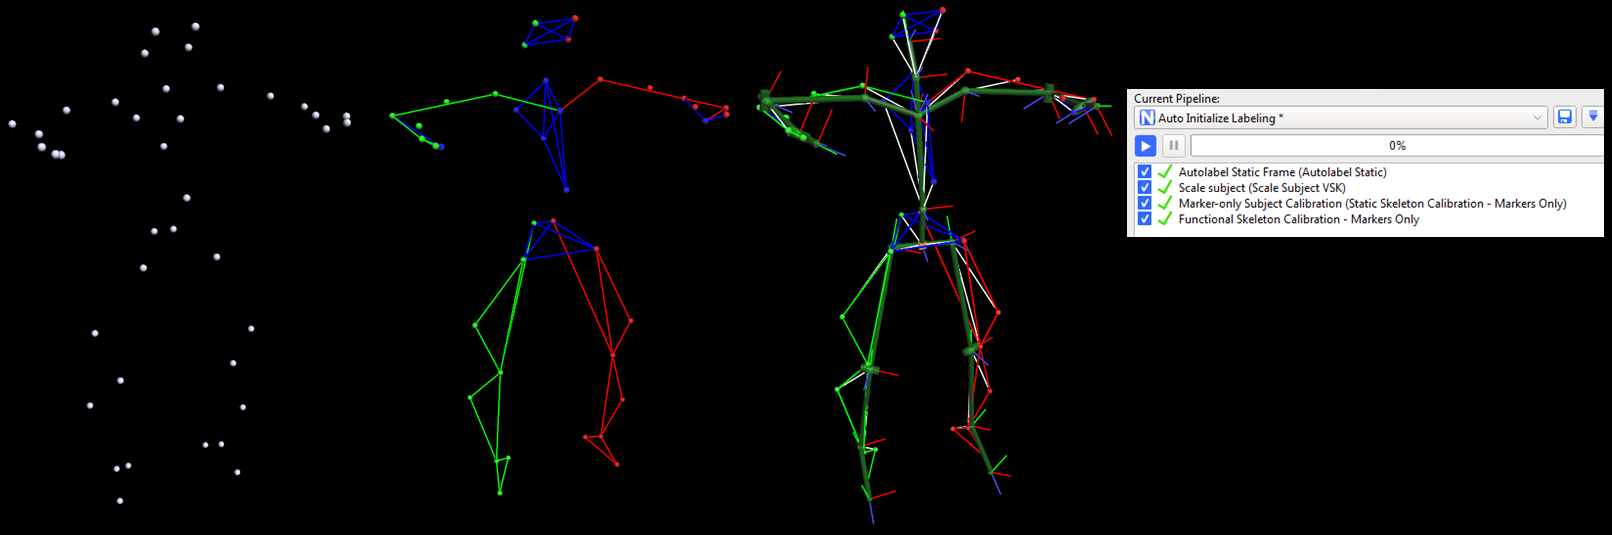
1. Capture a ROM trial where the first and last frames are of the subject in the 'motorbike' pose, as shown in the following image, in which:
– Arms are outstretched, held level or slightly lowered, with elbows bent and further forward than the shoulders (so that they don’t hide any of the body markers).
– Rest of body is straight.
– Feet point forward

2. For the rest of the ROM trial, have the subject go through the required range of motion.
3. In Nexus, attach the new PlugInGait FullBody Ai (Auto Initialize) labeling skeleton template (VST) file to the subject. (If your trial is for lower body only, you can use the supplied new PlugInGait LowerBody Ai template.)
4. Reconstruct the trial.
5. Run the supplied Auto Initialize Labeling pipeline, which includes operations to produce the initial labeling of the first frame, without having to perform manual labeling, basic scaling of the labeling skeleton template to the subject, and marker calibration (current frame only).
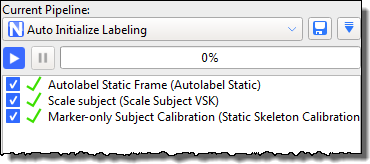
6. Assess the results by looking at the labeling of the whole ROM trial in the 3D Perspective view. For a more detailed check, look at the information on the data Quality tab.
Having assessed your labeling results, decide on your next action:
– If the results from Auto Initialize Labeling meet your requirements, go to step 8. (Process Static Plug-in Gait Model).
Tip: The Auto Initialize Labeling pipeline boots labeling from a single frame of data and in many cases, this ‘quick calibration’ produces a skeleton labeling calibration that is adequate to label data for the whole of the trial.
– If your trial includes more challenging or complex movement and therefore requires a further level of labeling reliability, run a functional calibration, which calibrates the subject’s bone lengths and joint and marker locations from the whole ROM trial, as described in step 7.
Tip: Functional Skeleton Calibration takes more processing time to complete than the Auto Initialize Labeling pipeline.
– If the results are not satisfactory, fix any issues before proceeding, or if necessary, recapture the trial.
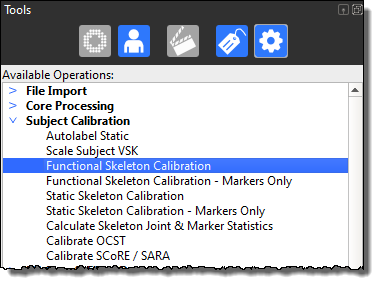
7. (Optional step) Add the Functional Skeleton Calibration operation from the Subject Calibration pipeline operations section and run it.
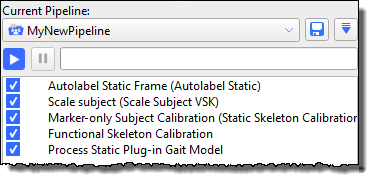
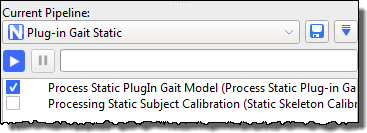
8. Run the Plug-in Gait Static pipeline, ensuring that you leave the check box for Processing Static Subject Calibration cleared (its default setting).
9. Save the ROM trial and the subject (VSK).
The new workflow may take longer than the previous process, particularly calibrating the ROM (Functional Skeleton Calibration). However, the extra time results in a significant improvement in labeling quality, which means that you will save significant amounts of time in processing the subsequent dynamic trials.
You can now Capture and process dynamic trials.
Tip: To save time in future, you may want to save all the relevant pipeline operations to one customized pipeline. To do this, add the relevant operations to the end of the Auto Initialize Labeling pipeline and save the pipeline under a new name.