 |
To create a biomechanics workflow, you use the new Biomechanics Workflow area of the Data Management tab in the Communications window to associate specified data capture and processing steps with particular trial types, and monitors.
Before you begin adding the steps that will comprise your new workflow, make sure you have set up any required range monitors (see View real-time subject calibration feedback with monitors).
The following example shows you how to set up a biomechanics workflow that includes steps for a static capture, followed by a ROM capture coupled with a joint range monitor.
To create a new workflow:
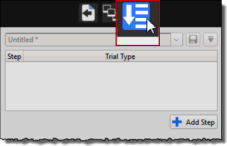
1. On the Data Management tab in the Communications pane, open the File Transfer/Batch Processing interface  and click the Biomechanics Workflow button.
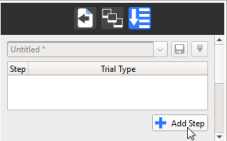
2. Click the Add Step button to add your first step,
3. Double-click on the new step and add a name for it, in this case, Static Calibration.
Important: For each step, this name will be the name of the trial that is saved as a result of running the step.
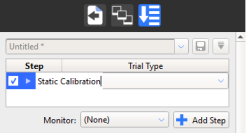
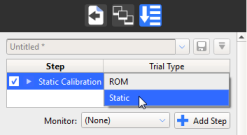
4. From the list of trial types to the right of the step name, select the required trial type for the step.
If the trial type doesn’t exist yet, switch to Live mode and on the Capture tools pane, specify the required settings for the trial type, for example, for a static trial:
– Name: Static
– Duration of the capture: 2 secs
– Run pipeline after capture: Reconstruct and Label
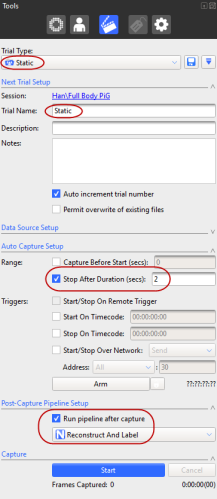
Save the new trial type and in the Trial Type list, select the new trial type (in this case Static).
Now, every time you go to Live mode and run the new workflow, the first step will automatically capture a 2-second, static trial, and run the Reconstruct and Label pipeline afterwards. It will then automatically go to Offline mode and display buttons to enable you to accept or reject the result of the first step (the reconstructed and labeled trial).
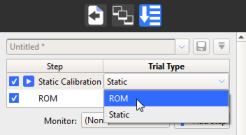
5. To set up step 2, in the Biomechanics Workflow area:
a. Click Add Step again.
b. In the Step column, type a name for the second step, in this case ROM.
c. In the Trial Type list, select the required trial type, for example, ROM.
If the ROM trial type doesn’t exist yet, you will need to create it, using the same procedure as you used for creating a static trial type in the previous step. For a ROM trial, you may want to specify a different duration, or clear the Auto Capture Setup options so that you can start and stop the capture manually, when sufficient data has been collected.
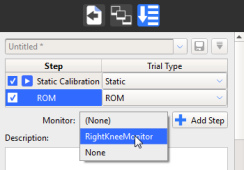
6. To add a range monitor to your ROM step so that you can quickly assess whether to accept it, click the Monitor button, and from the list of available monitors, select the required monitor, for example, the one you created previously (see View real-time subject calibration feedback with monitors).
7. Continue adding steps, creating appropriate trial types as necessary, and adding monitors to help you make the Accept or Reject decision for each step, until you have completed your workflow.
Tip: To reorder the steps, click on a step and drag it to the required position in the list.
8. To save the completed workflow, click the Save current configuration button  at the top of the Biomechanics Workflow area, and enter a suitable name for your new workflow.
9. To run your new workflow, change to Live mode and in the Biomechanics Workflow area, click Start.
When the step has run, Nexus automatically goes to Offline mode and the Biomechanics Workflow area displays buttons to enable you to accept or reject the result of the step.
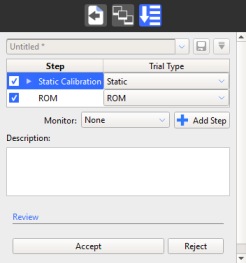
If you click Accept, the next step, is run. If you click Reject, Nexus returns to Live mode, so that you can perform another capture.
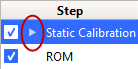
❙ When you run through the new biomechanics workflow, the Play icon is displayed next to the current step, so that you can instantly see where you are in the workflow,
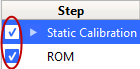
❙ In a similar way to running pipeline operations in the Pipeline tools pane, you can select or clear the check boxes next to each step to run only the required steps.
❙ If necessary, you can reorder the steps by dragging steps up or down in the Biomechanics Workflow area.
