 |
The latest version of Nexus is compatible with the Vicon Vantage range of cameras and hardware, enabling you to benefit from the power and usability of the new system.
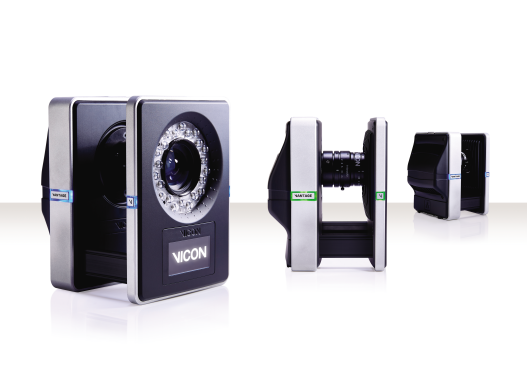
Vicon Vantage includes three camera models, beginning with the V5, which offers up to 420 fps with 5 megapixel resolution, the V8 at up to 270 fps with 8 megapixel resolution, and the V16, which can provide up to 120 fps with 16 megapixel resolution.
In addition, all three models offer:
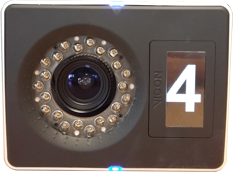
❙ A front-facing OLED display as well as side-mounted status lights, which give clearly visible camera ID information and system feedback. For more information, see New camera status LEDs and OLED display.
❙ An accelerometer, which enables you to select a camera in the volume simply by tapping it, and which monitors the camera position to alert you if any cameras are accidentally knocked or moved from their intended positions. For more information, see New Tap to Select feature and New bump detection and display.
❙ Thermal sensors, which monitor camera temperature levels so that you are warned of any changes in temperature that could affect the system status. For more information, see New temperature sensor display.
With a new Vicon-provided PoE+ switch, you can connect up to 12 Vicon Vantage cameras to the Vicon Vantage host PC. The system can be expanded to add more cameras or additional hardware by connecting further PoE+ switches.
For synchronization to third-party devices and timecode, together with connections for analog devices, you can add a Vicon Lock+ (see Support for Vicon Lock+ control units).
For more information on Vicon Vantage systems, see the Vicon Vantage Quick Start Guide and the Vicon Vantage Reference.
♦ Location: Camera's Properties pane > Settings section
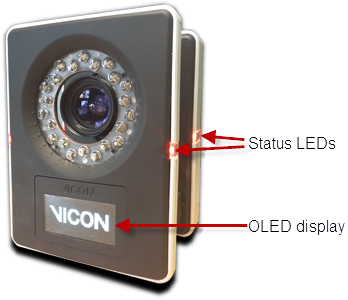
To help you monitor the status of Vicon Vantage cameras, the cameras include status LEDs and an OLED display:
❙ Two pairs of tri-color LEDS provide feedback on camera operation, one pair on either side of the camera, and the second pair on either side of the strobe.
❙ The OLED display on the front of the Vicon Vantage strobe, combined with the status LEDs' color, gives information about the current camera status.
Under normal conditions (unless a connected application changes the display, and unless the display has been disabled in Nexus), the display changes to reflect the camera status.
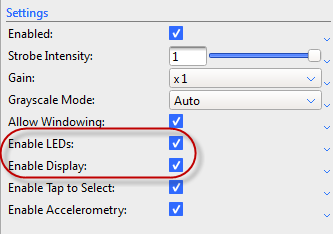
To change the display of Vicon Vantage camera status information:
1. In the System Resources list, select a camera (or all cameras).
2. In the Settings section of the Properties pane, select or clear Enable LEDs and/or Enable Display.
With Enable LEDs and Enable Display selected, while the camera is booting, the OLED display shows the Vicon logo and the status LED color changes from yellow during booting, to red when booting is complete.
When the cameras are communicating with Nexus, the status LEDs turn blue.
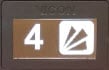
The display changes to reflect the camera's status, giving information about camera status, for example when the camera has finished booting, its calibration status, and whether it has been moved since calibration.
When Enable Display is cleared, the display is blank.

If Enable Accelerometry is selected (see New bump detection and display), the image on the display rotates based on the orientation of the camera.
After the camera has booted, you can check the cameras' status by observing the status LEDs and the OLED display on each camera. You can also monitor the camera status in Nexus.
For more information about the status LEDs, see the Vicon Vantage Reference.
♦ Location: Camera's Properties pane > Settings section
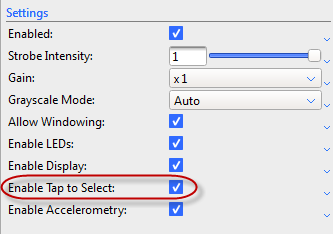
Vicon Vantage cameras provide a Tap to Select feature, which enables you to lightly tap the camera in the volume to select it (and deselect the other cameras). Enable Tap to Select is selected by default.
To turn Tap to Select on or off:
1. In the System Resources list, select the required camera.
2. In the Properties pane, go to the Settings section and select or clear Enable Tap to Select.
Note that when Enable Accelerometry is selected, if you tap a calibrated camera too hard, the camera is reported as 'bumped' (that is, its status LEDs and OLED display (if enabled) indicate that it is a bumped camera).
You can remove a camera’s bumped status in Nexus. If this is a frequent occurrence, you can change its sensitivity to being tapped by reducing the Bump Detection Sensitivity.
For information on removing a camera’s bumped status and reducing Bump Detection Sensitivity, see New bump detection and display.
♦ Location: Camera's Properties pane > Settings section and
Camera's Properties pane > Status section
In addition to the Tap to Select feature (see above), Vicon Vantage cameras also provide bump detection.
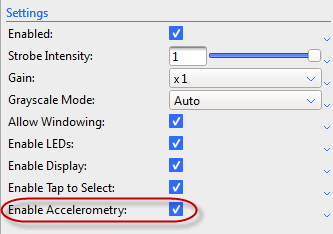
When Enable Accelerometry is selected (its default setting), bump detection works on calibrated cameras to alert you when they have moved from their calibrated positions. (This setting also turns on or off the auto-rotation of the display on Vantage cameras.)
To turn bump detection on or off:
1. In the System Resources pane, select a camera (or all cameras).
2. In the Properties pane, expand the Settings section and select or clear Enable Accelerometry.
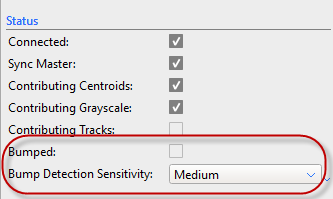
When Enable Accelerometry is selected, if a calibrated camera is accidentally knocked, its display changes.

In Nexus, the camera’s Bumped check box (in its Status properties) displays a check mark.
To change the sensitivity of the accelerometer:
1. In the System Resources list, select the required camera.
2. In the Properties pane, go to the Status section and select a different option in the Bump Detection Sensitivity pull-down.
To clear a camera's Bumped status:
For a single camera:
1. In the System Resources list, select the bumped camera.
2. In the Status section of the Properties pane, clear the Bumped check box.
For all cameras:
♦ Press Ctrl+Shift+B
Note the following limitations:
❙ Bump detection is active only on calibrated cameras.
❙ Bump detection cannot detect movement that does not change the local gravity vector, for example. slow translation with no rotation; rotation about the G-vector.
❙ Bump detection cannot detect movements that occur when the camera is not connected to a live system.
❙ The camera is detected as bumped when the reading from the accelerometer is sufficiently different from the last reading that was sent. Therefore gradual changes (for example, a slipping camera mount) may not be detected until they are large enough to trigger a new notification.
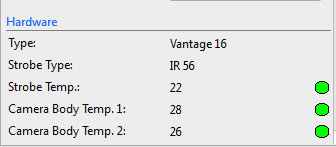
♦ Location: Camera's Properties pane > Hardware section > Strobe Temp, Camera Body Temp 1 and Camera Body Temp 2
Significant changes in camera temperature can have small effects on the camera's lens. Camera calibrations take into account lens intrinsics. Changes in these intrinsic properties can have small impacts on overall data quality.
However, note that large temperature changes generally result in only very small data effects. Temperature monitoring is made available to optimize calibration-to-collection consistency.
Vicon Vantage cameras have on-board temperature sensors. These onboard temperature sensors enable you to determine when cameras have reached a stable temperature from a cold start and to observe any change in camera temperature (possibly associated with environmental changes).
The data for the onboard sensors is displayed in the Hardware section. A numeric indicator (in degrees Celsius) and a colored temperature indicator is displayed for each of the sensors. The color of the indicator changes to reflect a change in temperature: yellow (warming up to the temperature specified by the lower bounds), green (between the specified upper and lower bounds) or red (overheated above the upper bounds).
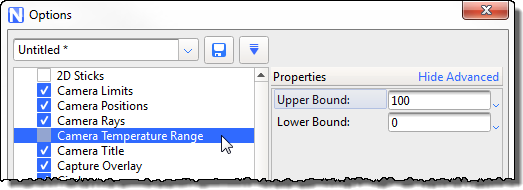
Because Vicon motion capture cameras are used in a wide variety of environments, a stable camera temperature will be different for different users. The Camera Temperature Range option enables you to set values that are representative of your laboratory environment.
You can change the upper and lower bounds of the temperature range in the Options dialog box (F7).
♦ Location: Camera's Properties pane > Settings section
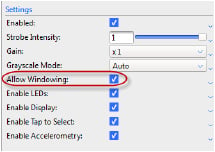
The configured frame rate affects the field of view. When you select Allow Windowing, if you specify a frame rate greater than the maximum frame rate for the camera at full resolution, image size is automatically reduced in comparison with that for a lower camera frame rate by windowing. This keeps the pixel rate the same by transmitting a greater number of smaller images per second.
Windowing is enabled by default.
To change whether to use windowing:
♦ In the Settings section of a camera’s Properties pane, select or clear the Allow Windowing check box.
