|
In the Vicon Nexus 2 workflow, you begin by capturing a ROM (Range of Motion) that starts with a few frames where the subject is static, as described in the following steps.
To use the new workflow to calibrate a subject:
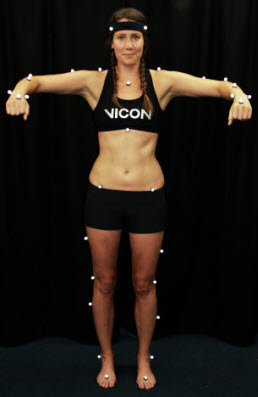
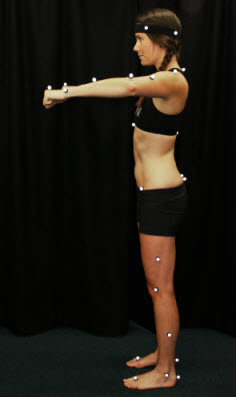
1. Capture a ROM trial where the first 1–3 seconds are of the subject in the 'motorbike' pose, as shown in the following image, in which:
– Arms are outstretched, held level or slightly lowered, with elbows bent and further forward than the shoulders (so that they don’t hide any of the body markers).
– Rest of body is straight.
– Feet point forward
2. For the rest of the ROM trial, have the subject go through the required range of motion.
3. In Nexus, attach the new PlugInGait FullBody Ai (Auto Initialize) labeling skeleton template (VST) file to the subject. (If your trial is for lower body only, you can use the supplied new PlugInGait LowerBody Ai template.)
4. Reconstruct the trial.
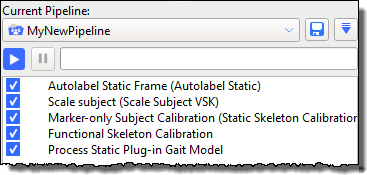
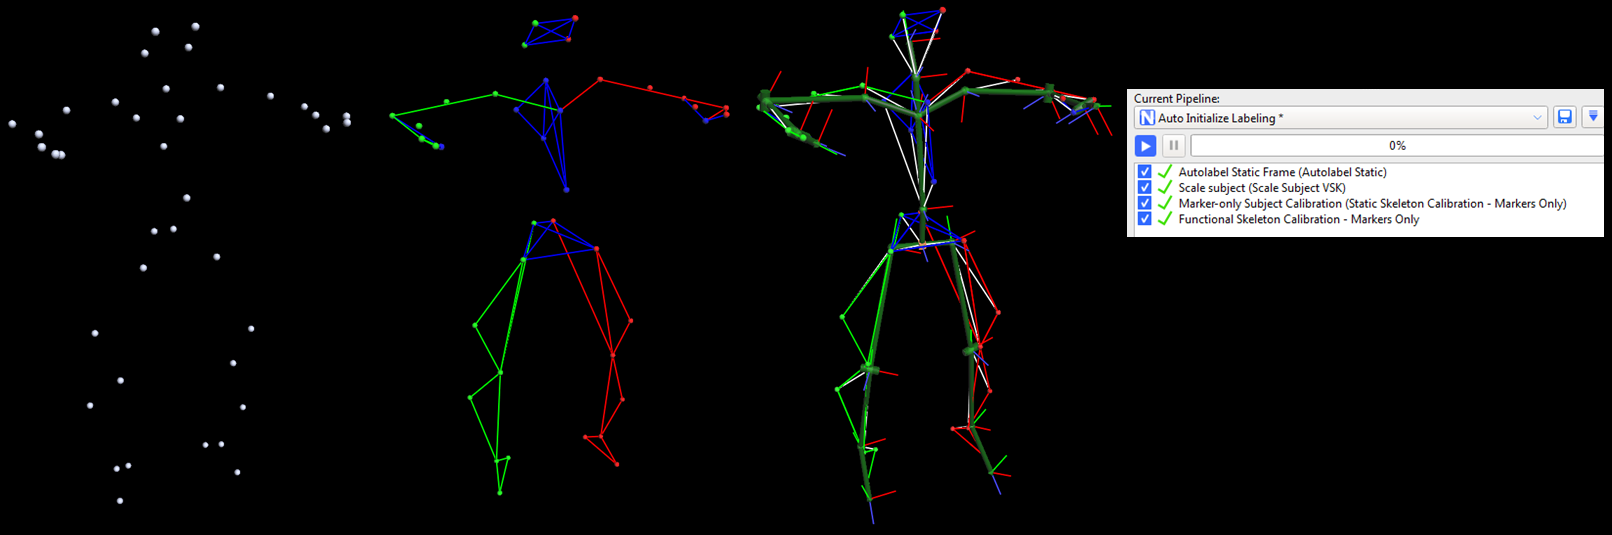
5. Run the supplied Auto Initialize Labeling pipeline:
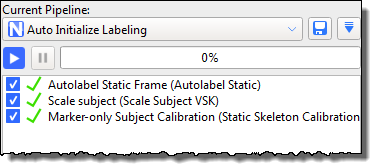
6. Save the trial and the labeling skeleton (VSK) (press CTRL+S or click the Save button  ).
).
7. Assess the results by looking at the labeling of the first frame in the 3D Perspective view. For a more detailed check, look at the information on the data Quality tab.
8. Depending on the results of the labeling, take the appropriate action:
– If the static frame is correctly labeled and the labeling skeleton fits well, processing your first dynamic trial will give you an indication of the level of labeling that this subject calibration will provide for your specific trial type. Based on these results, you can decide whether they meet your requirements. For example, for walking trials, the quick calibration produced by the Auto Initialize Labeling pipeline is likely to produce good labeling of dynamic trials,
If you judge that the results are satisfactory, go straight to step 10. (Process Static Plug-in Gait Model).
– If the results are not satisfactory, this may be because your dynamic trials include more challenging or complex movement and therefore require a further level of labeling reliability. To provide this enhanced reliability you will need to run a functional calibration, which calibrates the subject’s bone lengths and joint and marker locations from the whole ROM trial, as described in step 9. To ensure the best results, first consider the following two factors:
– If any markers are labeled incorrectly, fix them and from the Auto Initialize Labeling pipeline, re-run the Scale subject and Marker-only Subject Calibration operations; or
– If all the labels are correct but there is a large distance between a marker and the corresponding reconstruction, the labeling skeleton cannot accurately represent the configuration of labeled reconstructions. This is an indication that you may get poor labeling results and may need to improve your labeling skeleton template (see Requirements for custom labeling skeleton templates (VSTs)).
Note that Functional Skeleton Calibration takes more processing time to complete than the Auto Initialize Labeling pipeline.
9. (Optional step) Run a Functional Skeleton Calibration by completing the following steps:
a. Verify that the trial is correctly labeled for every frame.
Tip: Note that Autolabel Static Frame only labels the trajectories that are present on the static frame(s).
b. Check for any markers that get occluded and re-label them when they re-appear.
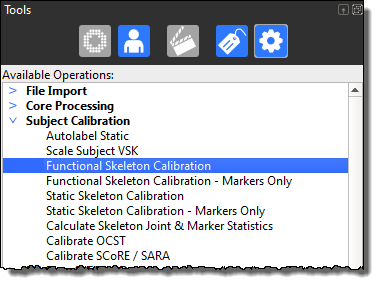
c. From the Subject Calibration operations section, add the Functional Skeleton Calibration operation and run it.
d. When the Functional Skeleton Calibration has completed, in the display properties (F7), click Subjects and in the Markers section, select Draw Covariance.
If you can see any large covariance ellipsoids around a marker, check for mis-labeling of a small number of frames for that marker and fix any mislabels. Note that some markers, such as the ASIS markers, will naturally have a larger covariance, due to skin motion.
Tip: The size of covariance ellipsoids vary, depending upon the way a marker is defined in a skeleton, the amount of marker movement possible, and the quality of the subject calibration. Particularly large covariance ellipsoids may indicate a poor calibration.
10. On the Time Bar, set a range of frames to select only the first few seconds of the static pose at the beginning of the trial.
11. In the Current Pipeline list, select the Plug-in Gait Static pipeline, and ensure that you leave the check box for Processing Static Subject Calibration cleared (its default setting).
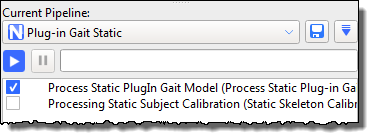
12. Click on the Process Static Plugin Gait Model operation and ensure that in the Properties pane, the First Frame is set to Selected Start and Last Frame is set to Selected End (the default settings).
13. Run the Plug-in Gait Static pipeline.
14. Save the ROM trial and the subject (VSK).
The new workflow may take longer than the previous process, particularly calibrating the ROM (Functional Skeleton Calibration). However, the extra time results in a significant improvement in labeling quality, which means that you will save significant amounts of time in processing the subsequent dynamic trials.
You can now Capture and process dynamic trials.
Tip: To save time in future, you may want to save all the relevant pipeline operations to one customized pipeline. To do this, add the relevant operations to the end of the Auto Initialize Labeling pipeline and save the pipeline under a new name.