
 |
Initialize face marker positions
When the calibration brim is correctly aligned and Vicon CaraPost has approximately calculated the camera positions, you must supply additional information to enable CaraPost to initialize the facial point data. This also enables CaraPost to calculate more accurate camera positions. You do this by matching additional seed points on the face, which are then used as a starting point to initialize the rest of the facial points.
The aim of this processing step is to correctly initialize the positions of all the face markers that you are interested in tracking through the take, and to ensure that there are matched detections in all the camera views in which they are visible.
Selecting additional seed points is similar to merging the calibration brim points except that you don't need to click in the 3D view (because unlike the brim, the 3D structure of the facial points is not yet known).
For the seed points, choose four or five points that are both:
❙ Spread over the face
❙ Near other detections
Typically, choose the following points:
|
Position |
Number of points |
Minimum number of camera views in which points are visible |
|
Forehead |
1 |
4 |
|
Chin and/or lips |
1 per position |
4 |
|
Cheek |
1 on each |
2 or more |
|
Nose |
1 |
4 |
Tip: Four or five points are adequate for a simple take, but a more complex take with a more sophisticated marker set may require more seed points. For information on selecting and using seed points for a (dense) 156 marker set and other marker sets, see 3D initialization for alternative marker sets in the Vicon CaraPost Reference.
To add seed points:
1. CTRL+click on the chosen marker in each camera view in which it is visible.
2. Press M to merge the detections.
When you press M, a yellow point should appear in the 2D view and also in the 3D view.
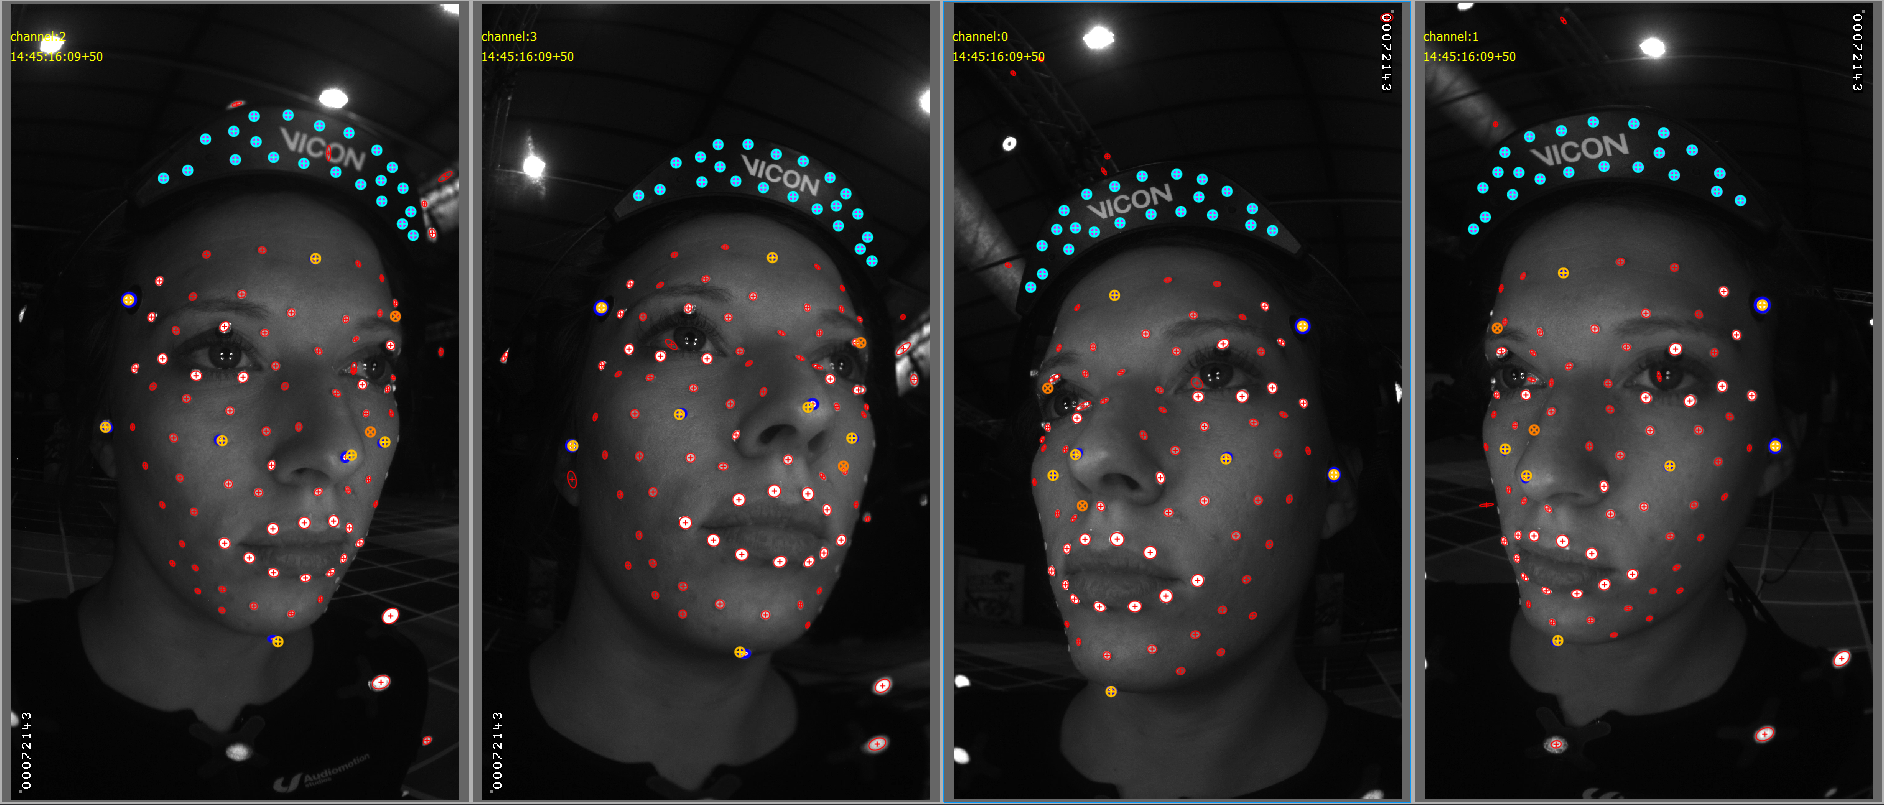
Repeat for all the points you want to use. For the ROM example provided, the result should look similar to the following image:
3. If you are working with the ROM take, zoom in to the nose marker in any camera view, and notice that it has a fairly large error line.
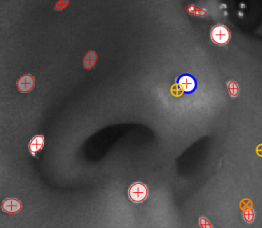
4. To use the additional seed points to further refine the camera positions and improve the accuracy of the points, on the Process menu, click Bundle Current Frame [Unconstrained].
The nose point now has almost no error line.
5. In the Properties pane, ensure that the Initialize 3D Parameters are set to the following (default) values:
– Max. Allowed Depth: 35.0
– Max. 3D Distance To Merge: 5.0
– Max. Allowed Symmetric Epipolar Distance: 5.0
For alternate marker sets, you may need to adjust these parameter values (see 3D initialization for alternative marker sets in the Vicon CaraPost Reference).
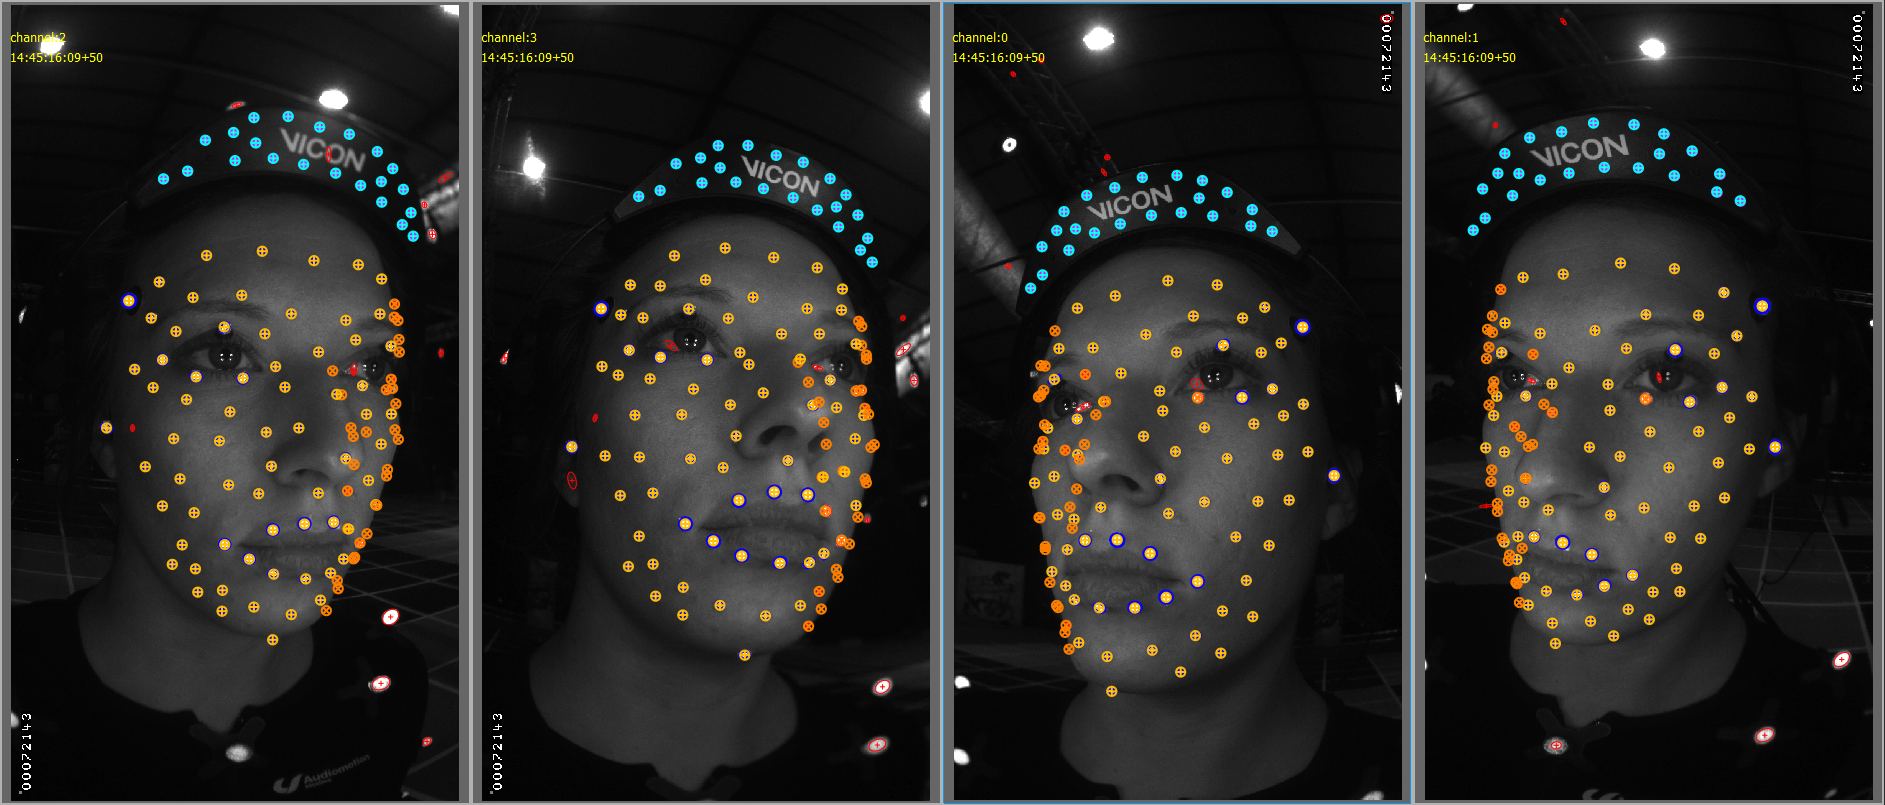
6. From the information you have supplied, you can now enable Vicon CaraPost to reconstruct all the other markers. To do this, on the Process menu, click Initialize 3D. The result should look similar to the following image:
 Review the results of the initialization in detail across the four camera views, and also in a 3D view. Look out for:
❙ Mismatched detections. These appear as 3D points that are not aligned with the rest of the face points. See the examples in Manually connect data .
❙ Undetected face markers that you want to track. See the examples in Manually connect data .
If you find mismatched points or connections that were missed by the automatic process, you will need to manually correct them. For information on how to do this, see Manually connect data.