
 |
Label face markers
To make it easier to identify points, you can give your face markers more recognizable labels than the default names. These marker labels will be carried throughout all your data and into your 3D package. You can label markers in either of the following ways, or use a combination of both methods:
Import marker labels
An example list of marker names is supplied with Vicon CaraPost, but you can use your own list of marker names as required. The names can to be in a simple text file (.txt) separated with spaces and/or carriage returns, or in an existing .cara file.
For more information about the .txt file format for marker labels, see the Vicon CaraPost Reference.
Example file supplied:
❙ MarkerList.txt
To import marker names and label the markers:
1. On the File menu, click Import Labels From Cara File or Import Labels From Text File and import the required file.
The list of marker names appears in the Labelling pane.
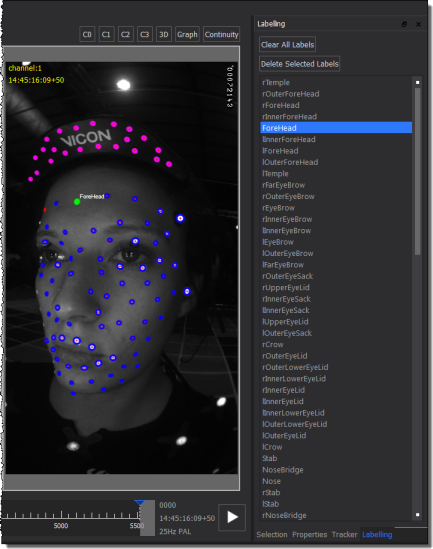
Tip: If you can’t see the Labelling pane, right-click on the menu bar of one of the visible panes and click Labelling.
2. To label a marker, select a point in a camera view or 3D view then click on the marker name in the Labelling pane and press M.
The name is now associated with that point. When you come to the Initialize from ROM processing step, the marker names are maintained across subsequent takes.
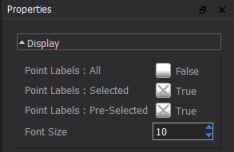
3. If you want to change the way the marker names are displayed, edit their properties in the Display section of the Properties pane:
Rename marker labels
In addition to importing a file containing marker names and assigning them to the markers, you can also rename marker labels.
To rename marker labels:
1. In a camera view, 3D view (View > New Floating Workspace), or in a Continuity graph, click on the point to rename and then press Ctrl+R (or Edit > Rename Point).
2. In the Rename Point dialog box, enter a new name.
The new label name appears in the view.
Tip: To view all custom labels, right-click in the view and then click Point Labels: All.