|
Example of tracking a partially occluded marker
One of the most common uses of the Target Tracker is to track markers which have become either partially or completely occluded during the take. The most common examples of where this happens are points on the eye or eyelid, and sometimes points around the lips for cases of extreme lip curl.
The following workflow demonstrates re-tracking over the top of interpolated results for a point in the corner of the eye that becomes occluded, where the automatic tracker has failed. This represents one of the most difficult tracking problems you may encounter using Vicon CaraPost.
The following illustration shows three examples of an eye corner point (selected in green at the frame before the gap starts), showing how the corresponding detection becomes occluded as the actor tightly closes his eyes:
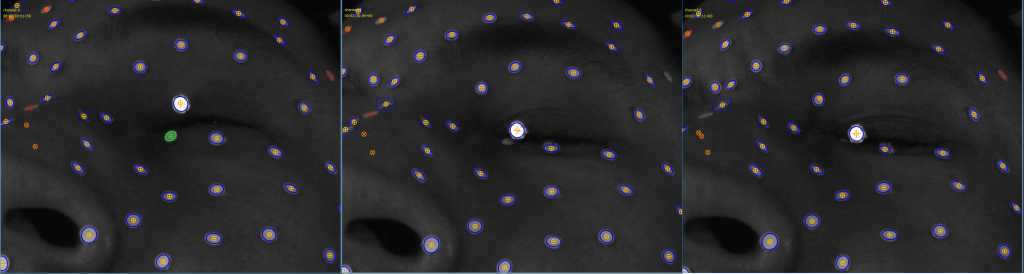
By the third example frame shown, the eye corner detection is almost completely occluded.
It may not be possible to produce a perfect result for this marker point, because it becomes almost completely occluded in some frames, but the Target Tracker enables us to produce reasonable results, by manually tracking the small parts of the marker that are visible, or the closest point to it if the marker becomes fully occluded. The workflow is similar to the standard use of the Target Tracker (see Fill gaps or re-track existing points with Target Tracker), but at points where the marker is badly occluded, you may need to manually add a large number of keyframes to achieve good tracking results.
To target track a partially occluded marker:
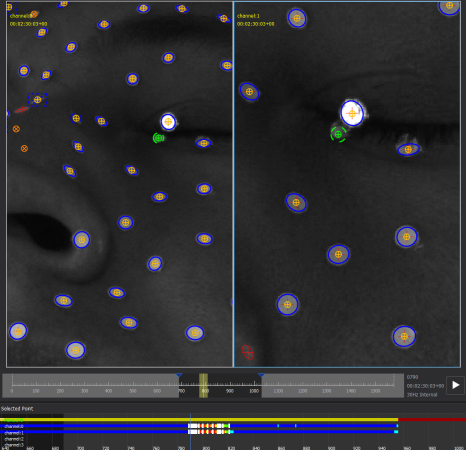
1. In a 2D or 3D view, select the point that contains the interpolated results (in this case, point 578) by clicking on it.
2. Go to (Ctrl+G) a frame just before the start of the interpolated result (or gap). In the above example, the tracking of the eye point has already started to drift off before the tracking completely fails, so you would go to the last good frame of tracking for this point, which is frame 789.
3. To add a keyframe, in the Tracker pane, click Add Keyframe To Current Frame.
A white tracking box appears around the selected marker and a white bar is displayed in the Selected Point pane and the Continuity chart.
In this case, the marker point is attached to detections in channels 0 and 1 in the frame before the gap, so keyframe detections are added in channels 0 and 1 only.
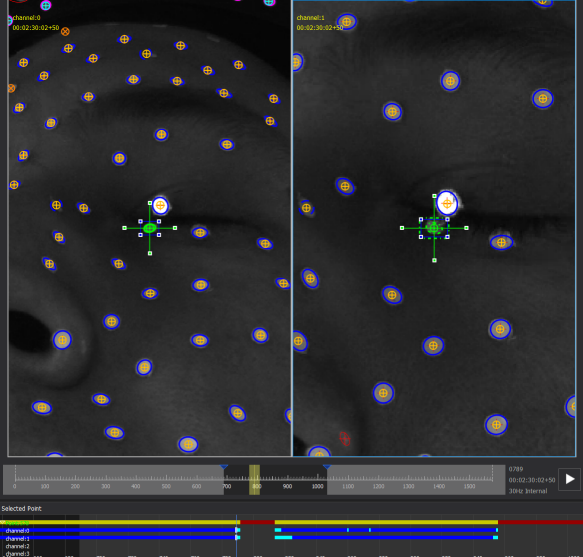
4. Go to the frame after the gap frame (in this case, frame 826) and add another keyframe.
5. In the Tracker pane, ensure that:
– Break Threshold is set at an appropriate level. 0.8 is usually a reasonable value to start with, but may need to be slightly lower in this case, if we cannot get the Target Tracker to track.
This parameter defines how well the image patch being tracked has to match the corresponding patch in the adjacent frame (with 1 being a perfect match) for tracking to continue. If the patch falls below this score then tracking stops. In this case, the marker appearance changes a lot across the gap so the tracking will probably stop due to the Break Threshold being reached on a number of occasions.
– Stop On Next Keyframe is selected.
– Overwrite Existing Tracks is selected. Note that if you are tracking over a gap (rather than an existing interpolated result), for difficult tracking cases, you should probably select this option, as you may need to redo some of the tracking if/when the Target Tracker fails.
6. Ensure you are still at the frame after the gap (frame 826). Because this tracking task is very difficult, track backwards one frame at a time by clicking the Track backwards one frame button (|<), so you can immediately see if the tracking fails.
7. Keep tracking backwards frame by frame, until either the Target Tracker fails to track in both channels, or the Target Tracker makes a tracking error, as shown in the following example.
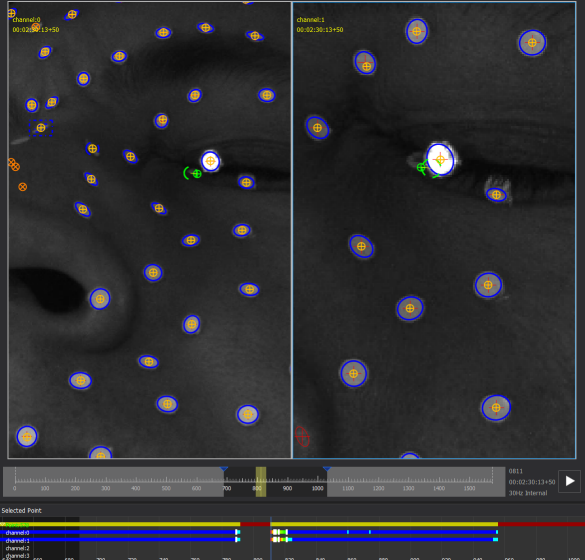
8. When you hit a failure case, navigate forward one frame, and add an additional keyframe at the last good tracking result by clicking Add Keyframe to Current Frame.
In most cases, adding a keyframe should give the Target Tracker the additional information it needs to carry on tracking. Rarely, you may also have to force the tracking to continue by:
– Editing the keyframes by hand in the failure frame; or
– Lowering the Break Threshold value slightly to force it to track
9. Continue Steps 7 and 8 until you have filled the gap completely, as shown in the following illustration. For a very demanding take, you may need many keyframes to fill the gap.