|
Fill gaps or re-track existing points with Target Tracker
The main use of the Target Tracker is to fill in gaps or to re-track over poor existing results (or interpolated results) for a point.
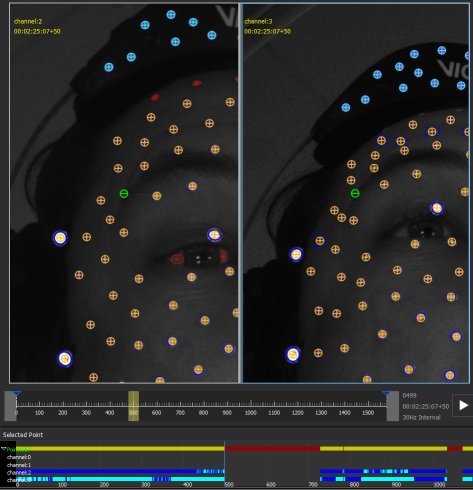
The following workflow demonstrates re-tracking over an existing interpolated point result for a point where the automatic tracker has failed. The illustration below shows an eyebrow marker point where the automatic tracker has generated a purely interpolated result (shown as a red bar in the Selected Point pane).
To re-track over the interpolated data, you need to add keyframes and track the blob using the Target Tracker.
To re-track over the interpolated data:
1. In a 2D or 3D view, select the point that contains the interpolated results (in this case, point 567) by clicking on it.
2. Go to (Ctrl+G) a frame just before the start of the gap, which in this case is frame 498. Check that the tracking result for the point looks OK in this frame.
3. To add a keyframe, in the Tracker pane, click Add Keyframe To Current Frame.
Tip: If you can’t see the Tracker pane, right-click on any menu bar and then click Tracker.
A white tracking box appears around the selected marker and a white bar is displayed in the Selected Point pane and the Continuity chart:
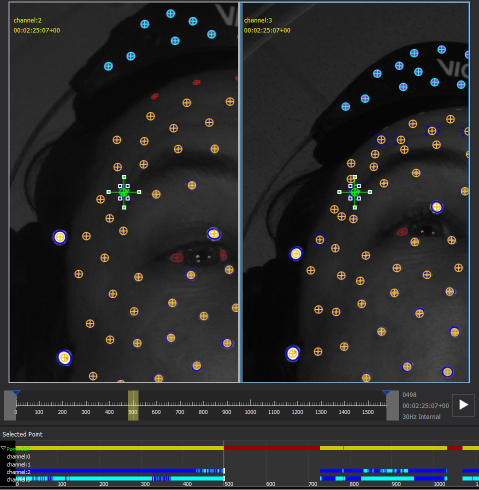
In this case, the marker point is attached to detections in channels 2 and 3 in the frame before the gap, so keyframe detections are added in channels 2 and 3 only.
Tip: If required, you can add additional detections in other channel(s) by clicking Edit > Edit Target Track (for more information, see Create and track a new target-tracked point.
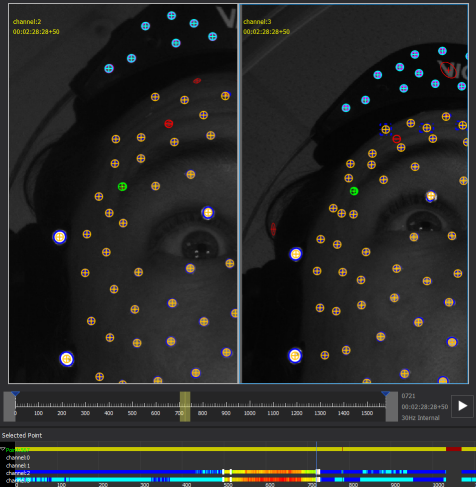
4. Go to the frame after the gap (in this case, frame 728) and add another keyframe.
5. In the Tracker pane, ensure that:
– Break Threshold is set at an appropriate level. 0.8 is usually a reasonable value to use.
This parameter defines how well the image patch being tracked has to match the corresponding patch in the adjacent frame (with 1 being a perfect match) for tracking to continue. If the patch falls below this score then tracking stops.
– Stop On Next Keyframe is selected.
– Overwrite Existing Tracks is selected. Note that if you had a pure gap, rather than an interpolated result, you could leave this option cleared.
6. Ensure you are still at the frame after the gap (frame 728) and click the Track backward button (<).
The Target Tracker tracks backwards across the gap, displaying a colored bar between the two keyframes, which indicates the quality of the Target Tracking result.
7. Check the quality of the tracking results, both in the 2D views and in 3D. If you are satisfied with the quality of the result, you can stop at this step.
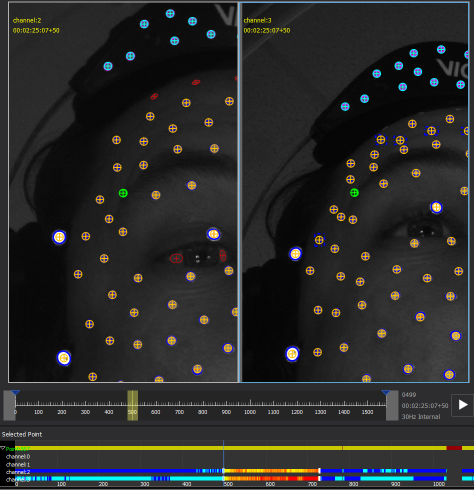
8. However, if the Target Tracker has not produced good results across the whole gap, you can usually improve the results by adding keyframes at a few additional locations using the Add Keyframe To Current Frame button. For each added keyframe, ensure that the keyframe detection in each camera view is located at exactly the right position before re-tracking over the poor quality results using the Target Tracker. The following illustration shows how two additional keyframes have been added to improve the tracking results in this case: